

Finn Sword
- josephaguilarsanch
- Aug 26, 2020
- 5 min read
Updated: Sep 20, 2020
C'mon grab your friends! We'll go to very distant lands!

Who didn't want to wield (arguably) Finn's most iconic sword? Adventure Time is my favorite show and being able to bring this sword to life and have it mounted up on my wall brings just a little bit of the magic of the show to life.
Major Features

Blade/Hilt
The entire sword body itself is divided into three large pieces, two of which are the blade, one of which is the hilt. All the alignment cavities feature drafts that allow for printing all pieces without the need for supports. The connecting pieces were made almost as large as the pieces they are connecting to ensure little flexing/bending of the blade.
Blade Tip Guard
This sword comes with a blade tip guard that allows you to clamp the sword together when glueing in such a way that will prevent your clamp from damaging the blade tip and ensure you are getting accurate longitudinal compression. When I clamped my sword I actually used the blade tip guard and the inside of the gem cavity as my clamping points.
Resin Jewel Kit
For this resin kit I went with a two piece clamp design, securable by four M3 nuts and bolts. As usable the mold shell, plug and shell baseplate are completely reusable. This comes in handy when casting the jewel itself since it requires so much resin and uses very little rubber mold comparatively. By placing the rubber mold back in the mold shell, it prevents the gem from warping when you pour in all thee resin. Speaking of, I would highly recommend checking out what I had to say about casting such a massive Gem in the Builds section.
Rubber Volume: 149 mL
Resin Volume: 249 mL
As usual I recommend using a little more resin/rubber than required to account for what's left behind on the mixing container walls. I also once again recommend you check out my experience in casting using a quarter liter of resin. You cannot treat it the same as any other resin casting.
Wall Mount
Some Wall Mounts were included in this design as well. They were designed to hold the sword horizontally and far enough from the mounting surface as to not damage the gem. Designed to use small drywall screws. Fillets were used to reduce stress concentrations. I think they look pretty cool as well.
Builds

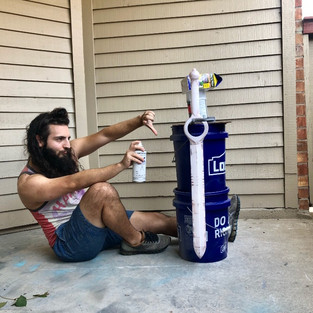
Here you can see the Finn Sword in all its finished glory. Overall it was a very fun and interesting project.
I started off glueing the entire thing together first. This project used large alignment blocks to help prevent bending and allow for only a little bit of Loctite super glue along the edges to fill the seam. Like I've mentioned, Super Glue is the only thing that bonds well enough to prevent bending and cracking on tall thing prints like swords. I used some basic PVC cement in the actual cavities itself to help hold the alignment block in place.

I did this for the whole sword at once and clamped it together using my blade tip guard to prevent damage to the tip. Notice that I was able to clamp it together due to the gem cavity in the hilt, otherwise, this sword was too large for my biggest clamp

Next I'll briefly summarize my sanding process. Filler Primer, 60 grit electric sander, Bondo, 140 grit, filler primer, 400 grit, 800 grit, 1500 grit, 2000 grit, 3000 grit. I'll eventually make a tutorial post on why I do it this way (with slight variations from print to print) and what things you want to think about in the sanding/painting process of a print.
Here you can see my very basic painting set up at various stages. From Left to Right: Post Bondo, Post Second Primer, Pre Final Paint (white gloss paint) during the very important artistic brooding process


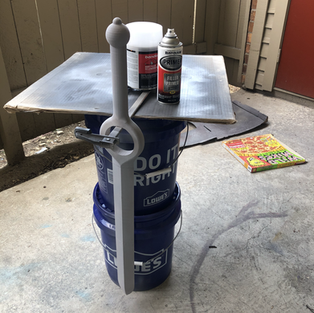

I didn't go with any sort of clear coat on this since I found that glossy paints, with prints sanded to 3000 look well enough without them.
The Gem
The gem was a very important part of this build and I wanted to make sure I get it right.
Everything started off going well, I printed the gem and sanded it all the way down to 3000 grit using the same process I used for the sword. I then printed the mold baseplate and two mold shells and assembled everything so that it was ready for the molding process.

From the model, I know that I'm only going to need 150 mL. I go with 160 just ensure I fill the mold due to losses I experience due to liquid rubber sticking to the mixing stick and side of the cup. Like always, It always pay off to know the exact volume of rubber before hand, as I can save my Oomoo rubber for many more prints. You can also see all the M3 bolts actually keeping the mold together, making this mold shell completely reusable.
Here you can see my vacuum chamber and vacuum pump setup as it was for my second and most successful attempt at resin casting.

My first attempt actually ended up like this

So the keen observer might notice that this is not the correct shape. To understand what failed here, you have to understand how resin works. The resin curing process is an exothermic chemical reaction. This essentially means it creates heat as it goes on. The problem with this is that heat is an input into the same reaction. So what occurs is that your reaction produces heat, which speeds up the reaction and produces even more heat. This is not really an issue until you get into large volumes like the one shown above (250 mL). Essentially this reaction started to run away and get way too hot, this mixed with the fact that it was at vacuum meant that the resin mixture started to boil. Not only that, but the heat caused it to cure mid-boil. For reference, the curing process is supposed to take 48 hours, not 15 minutes.
To solve this issue, I degassed the resin in three separate cups, in volumes that I already knew to be safe from previous casts. Here you can see them once I've gotten all the bubbles out.

Once I degassed them, I poured them all into the mold. Now the volume was still the same, so this mold got HOT, but luckily it did not boil again and it cured quickly and ended up fine.
On the left you can see everything once I pulled it apart, in the middle you can see a before image of the gem, and then on the right you can see the gem once I was done sanding and polishing it.


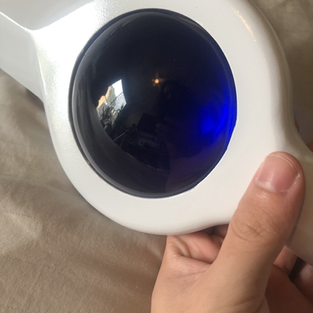
For the polishing process i went 400 to sand away all the surface spots where bubbles manage to trap themselves. Then I wet sanded at 800,1500,2000 with my electric sander, making sure to not soak anything as to preserve my sander. Then I finished with some wet hand sanding at 3000, and 5000 grit and I polished it using car polish and an electric car buffer. I will eventually make a tutorial on that process as well so check back in.
To actually secure the gem in the hilt, I just wrapped a rubber band around it and shoved it in there.
What Next?
If you are looking to create you own models like this one feel free to checkout all of my tutorials on 3D modeling and prop making techniques.
If you are looking to purchase the model so that you can print your own you can find it in the store.
Lastly, make sure to check back in every once in a while to see what I've been working on
Thank you for your time
Comentários